I’ve been using Tailscale for years as my personal VPN: incredibly convenient, zero-config, works everywhere. But I never kept it always active — I’d turn it on when needed and shut it down after. A bit crude as precautions go, I know, but there was a reason: a VPS server exposed to the internet sitting in the same network as my home devices never sat well with me. At some point I decided to do things properly, instead of relying on manual discipline.
1. The problem: Tailscale network is flat by default
Tailscale creates a private mesh network between all your devices. By default, every node can reach every other node on any port. It’s convenient, but it’s a flat network — exactly like a home LAN where everyone can see everyone else.
My setup: a VPS server exposed to the internet (Nginx, some open ports, public services) in the same Tailscale network as my home PC, smartphone, and Raspberry Pis. The risk is obvious — which is why I wasn’t keeping Tailscale always active. But “I turn it off when I don’t need it” isn’t a policy: it’s an excuse. It only takes forgetting once, or wanting to check the monitoring at 2am, to have the flat network active without having thought about it.
The right solution isn’t toggling on and off — it’s segmenting: ensuring that the VPS, even if compromised, cannot reach anything on the other side of the network.
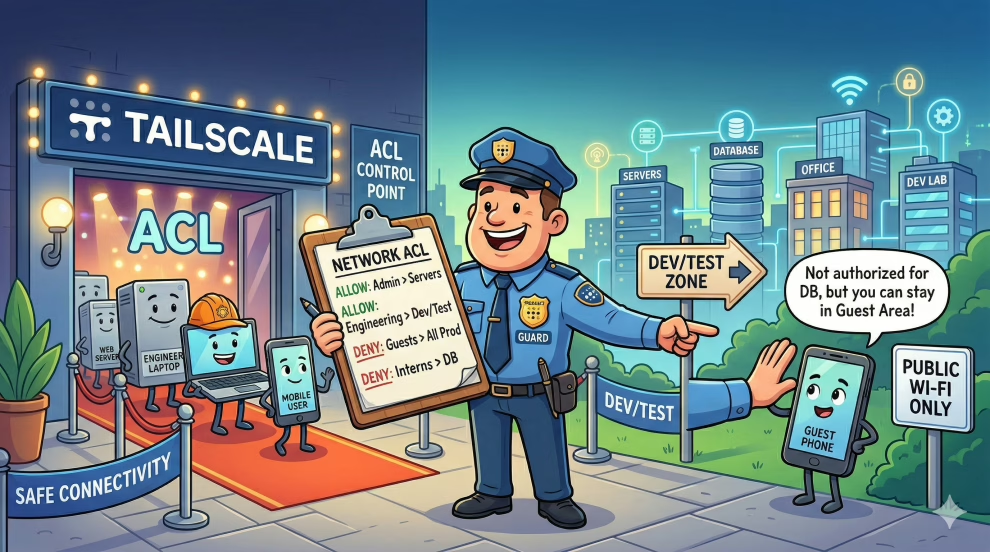
2. The solution: Tailscale ACL and tags
Tailscale lets you define access policies through a configuration file in HuJSON format (JSON with comments), managed from the admin console. The mechanism is based on two concepts:
- Tags: labels assigned to devices (e.g.
tag:server,tag:monitoring). Tags let you group devices by role, regardless of who owns them. - ACL (Access Control List): rules that define who can talk to whom, on which ports and protocols.
The system operates as a whitelist: everything not explicitly permitted is blocked. This is the key difference from the default configuration.
Tags are defined in the tagOwners section of the policy file, which specifies who has the right to assign that tag to a device. Tags are then assigned to devices from the admin console or via tailscale set --advertise-tags on the device itself.
3. Network design
I structured the network with five devices, each with a well-defined role:
| Device | Tag | Role |
|---|---|---|
| Desktop PC | tag:personal | Work machine / daily use |
| Smartphone | tag:personal | Personal mobile device |
| Raspberry Pi (generic) | tag:homelab | Internal services, experiments |
| Raspberry Pi (monitoring) | tag:monitoring | Prometheus, Grafana, alerting |
| VPS Server | tag:server | Public services exposed to the internet |
The access logic I wanted to implement:
personaldevices can reach everything (I’m the one administering)- The
monitoringnode can scrape all nodes (port 9100 for node_exporter) - The VPS
servercan be reached frompersonalandmonitoring, but cannot initiate connections to others homelabis isolated: it cannot be reached from the server
4. The implemented policies
Here is the resulting visibility matrix:
| From To | personal | homelab | monitoring | server |
|---|---|---|---|---|
| personal | ✓ | ✓ | ✓ | ✓ |
| homelab | ✗ | ✓ | ✗ | ✗ |
| monitoring | ✗ | ✓ (9100) | ✓ | ✓ (9100) |
| server | ✗ | ✗ | ✗ | ✗ |
And the corresponding HuJSON ACL file:
{
  // Who can assign tags
  "tagOwners": {
    "tag:personal":    ["autogroup:admin"],
    "tag:homelab":     ["autogroup:admin"],
    "tag:monitoring":  ["autogroup:admin"],
    "tag:server":      ["autogroup:admin"]
  },

  "acls": [
    // Personal devices can reach everything
    {
      "action": "accept",
      "src":    ["tag:personal"],
      "dst":    ["*:*"]
    },

    // Monitoring can scrape homelab and server (node_exporter)
    {
      "action": "accept",
      "src":    ["tag:monitoring"],
      "dst":    ["tag:homelab:9100", "tag:server:9100"]
    },

    // Monitoring can reach itself (e.g. Prometheus → Grafana)
    {
      "action": "accept",
      "src":    ["tag:monitoring"],
      "dst":    ["tag:monitoring:*"]
    },

    // Homelab can only reach itself
    {
      "action": "accept",
      "src":    ["tag:homelab"],
      "dst":    ["tag:homelab:*"]
    }

    // Everything else is implicitly blocked (whitelist)
  ]
}
With this configuration, the VPS cannot open connections to any other node. Even if compromised, it is isolated from the rest of the network.
5. A common mistake: tags not assigned to devices
This is the mistake I made the first time, and it’s probably something anyone approaching this configuration will run into.
I wrote the policy, saved it in the Tailscale console, and connected via SSH to the server. Everything worked. I waited a few minutes, then tried again — and SSH stalled. No explicit timeout, just silence.
The problem: I had defined the tags in the policy but had not assigned them to the devices. A device without a tag matches no ACL rule, so in whitelist mode it can neither send nor receive anything — except connections already active when the policy was applied (which eventually expire).
Diagnose this with:
tailscale statusIn the tags column, devices without tags appear empty or show only the username. The fix is to assign tags from the device itself:
# On the VPS server
sudo tailscale set --advertise-tags=tag:server

# On the monitoring Raspberry Pi
sudo tailscale set --advertise-tags=tag:monitoring

# On the generic Raspberry Pi
sudo tailscale set --advertise-tags=tag:homelab
Or from the Tailscale admin console, in the Machines section, by clicking on the device and editing its tags. After assignment, ACL rules become effective within a few seconds.
Note: to assign a tag to a device, that user (or the device itself, if using an auth key with pre-authorization) must be listed in the tagOwners section of the policy.
6. Conclusion
The principle of least privilege isn’t just for enterprise applications. Applying it to your home network — even with consumer tools like Tailscale — makes a real difference.
The practical result for me was being able to keep Tailscale always active without having to think each time about what is connected to what. Segmentation transformed a fragile behavioral precaution (“remember to turn it off”) into a structural guarantee: the VPS is isolated by design, not by discipline.
A few dozen lines of HuJSON, tags assigned to devices, and the network topology finally reflects what I actually wanted — not what was convenient to leave as default.
If you manage a Tailscale network with devices of different trust levels (and a server exposed to the internet definitely qualifies as lower-trust than your laptop), it’s worth spending an afternoon to do this work properly.
Want to do this in five minutes? Delegate it to Claude
If your network has more than a handful of devices, designing tags and ACL rules by hand becomes tedious — especially if you don’t yet know the HuJSON syntax well. There’s a much faster way: export the host list from Tailscale and have Claude process it directly.
Go to the Tailscale admin console → Machines, copy the list of machines with the hostname and role of each one, then paste everything into Claude with a prompt like:
Here is the list of machines on my Tailscale network:

- pc-home           → personal PC, daily use
- personal-phone    → personal smartphone
- rpi-monitor       → Raspberry Pi with Prometheus and Grafana
- rpi-homelab       → Raspberry Pi for experiments
- vps-prod          → VPS server exposed to the internet

Create a complete HuJSON file for Tailscale ACLs:
- assign appropriate tags to each device based on its role
- define a sensible isolation policy (the server should not be able
  to reach personal devices or the homelab)
- the monitoring node must be able to scrape all nodes (port 9100)
- add explanatory comments for each rule
- include the tailscale set --advertise-tags commands for each device
In response you’ll get a complete and commented HuJSON file, the list of commands to run on each node, and a ready-made visibility matrix — all ready to paste into the Access Controls section of the Tailscale console. If something doesn’t look right, just ask for adjustments: in a few exchanges you’ll arrive at a custom policy without having to study the syntax from scratch or re-read the documentation every five minutes.